Zoho CRM Integration Setup Guide for users
Step 1 - Enable the extension for Zoho CRM
After your administrator has enabled the Zoho CRM integration, the next time you use CrankWheel, you will be prompted to visit the CrankWheel CRM integration page to complete CRM setup.
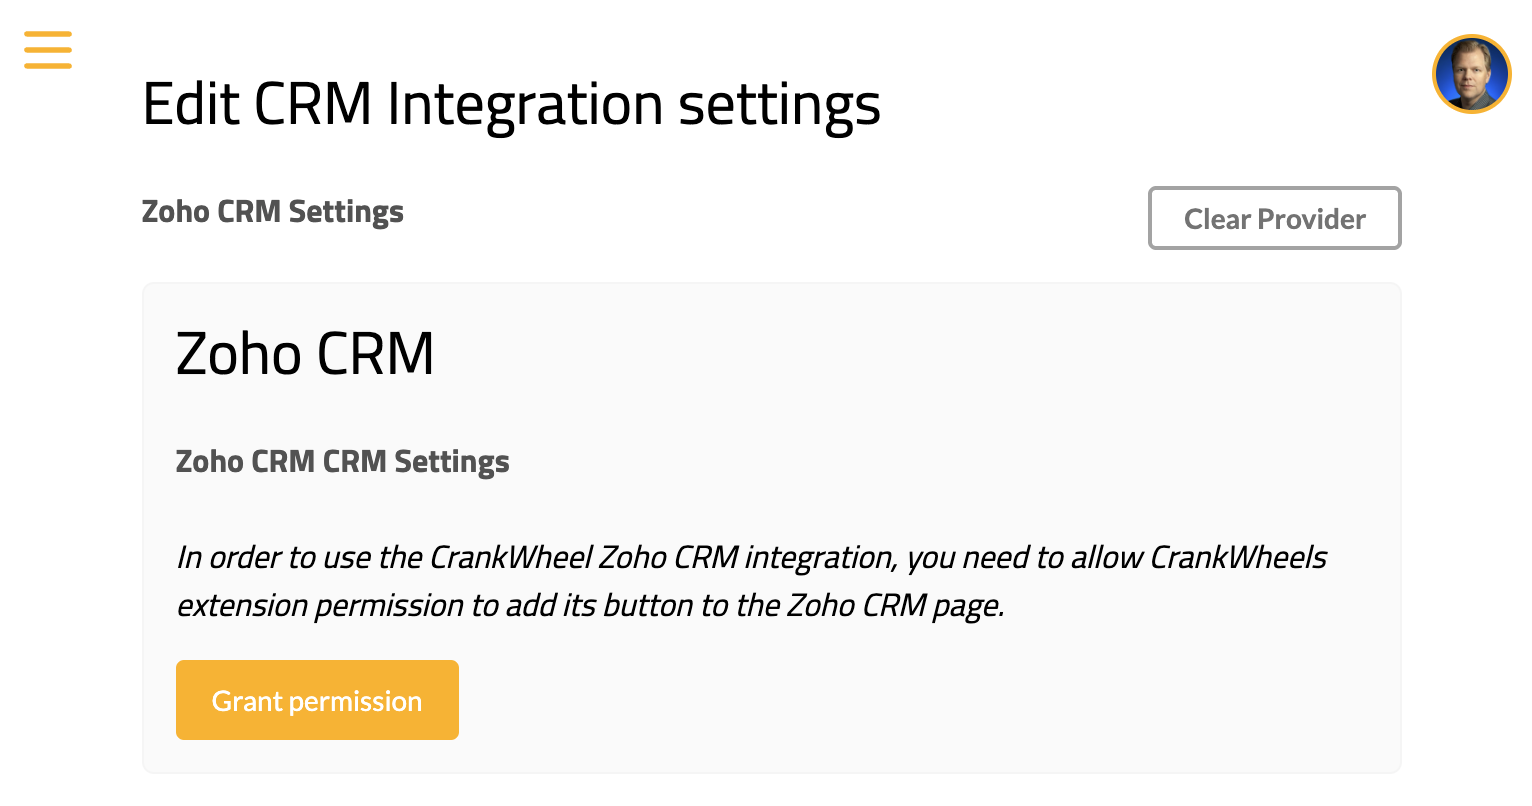
This page will show Zoho CRM as the selected CRM integration. Please click the button labelled “Grant Permission”.
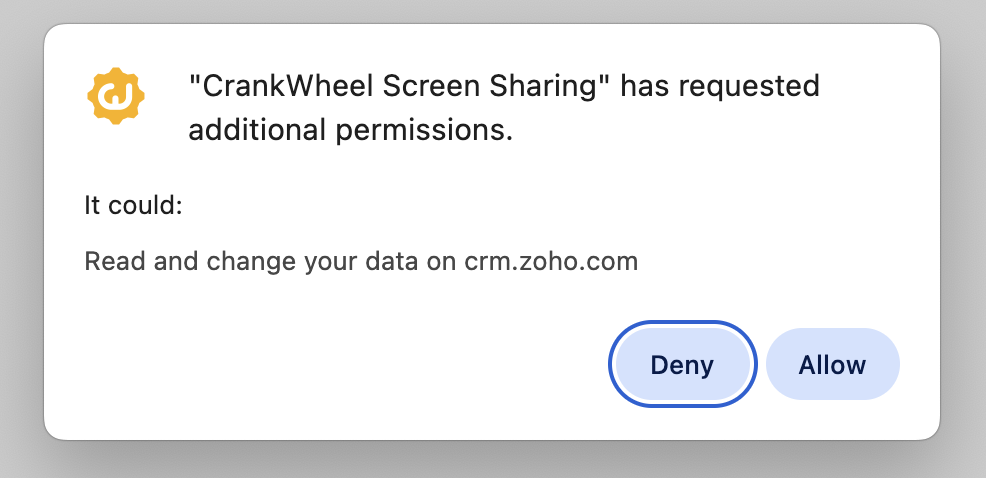
A dialog will open asking you if you want to allow the CrankWheel extension to read or edit pages on crm.zoho.com. Click Allow to enable the extension.
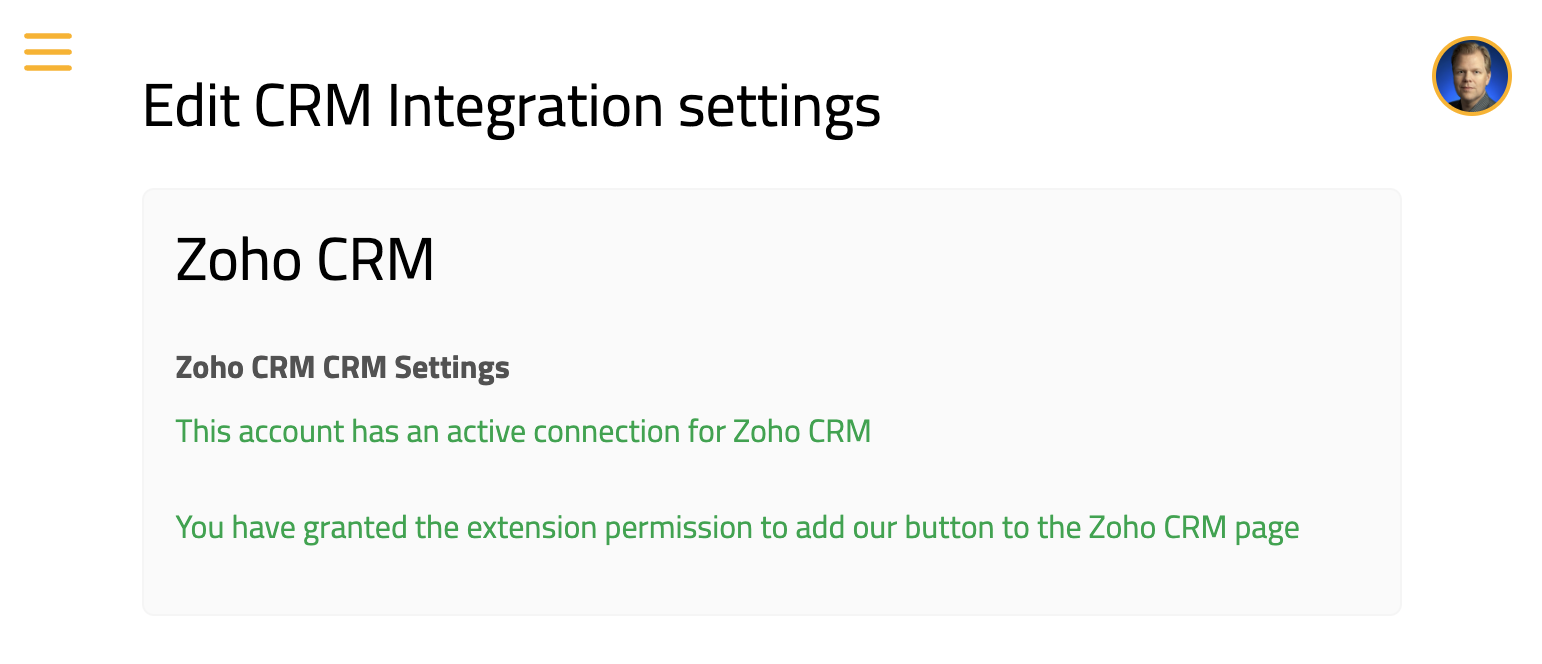
At this point, assuming your administrator already enabled the connection to Zoho CRM, the integration page should show as follows and you will be ready to start using the integration.
Step 2 - Start a meeting from Zoho CRM
Open a Lead or a Contact in Zoho CRM. You should see a CrankWheel button in the actions header for the Lead or Contact (near the “Send Email” and “Convert” buttons). You can click either this button, or the extension button (right hand side, a bit above the web page) to launch CrankWheel with this contact’s details.
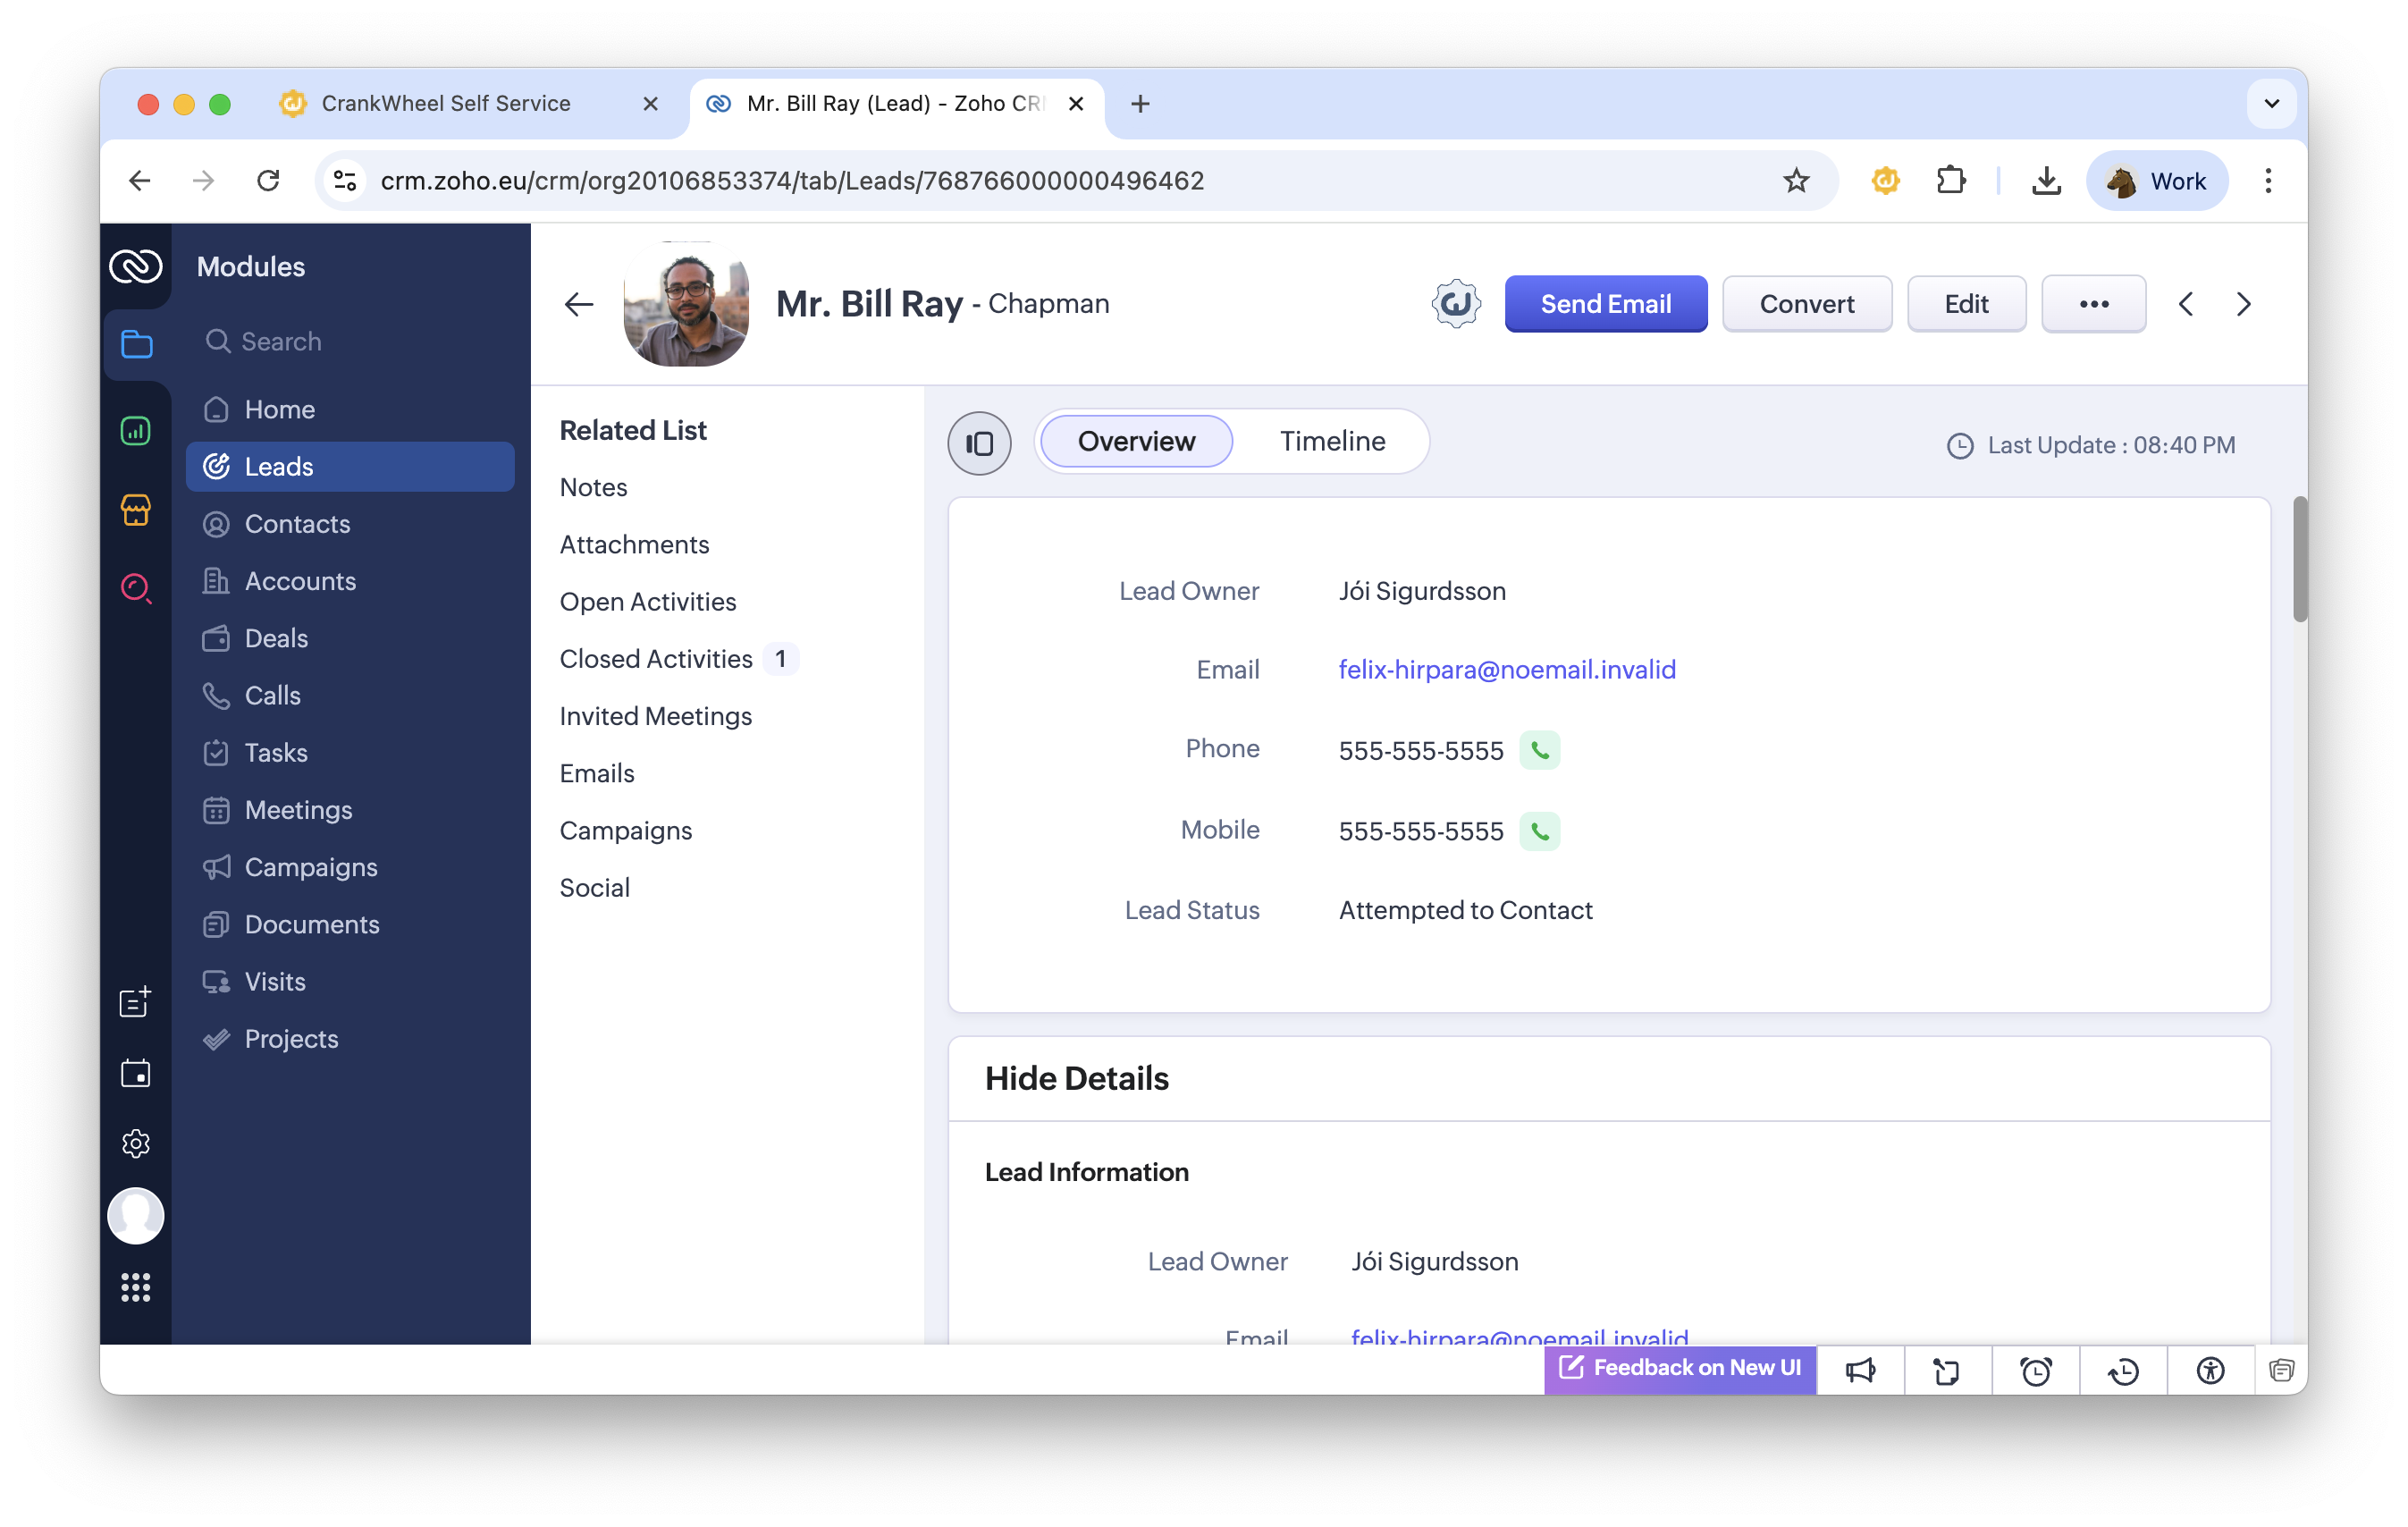
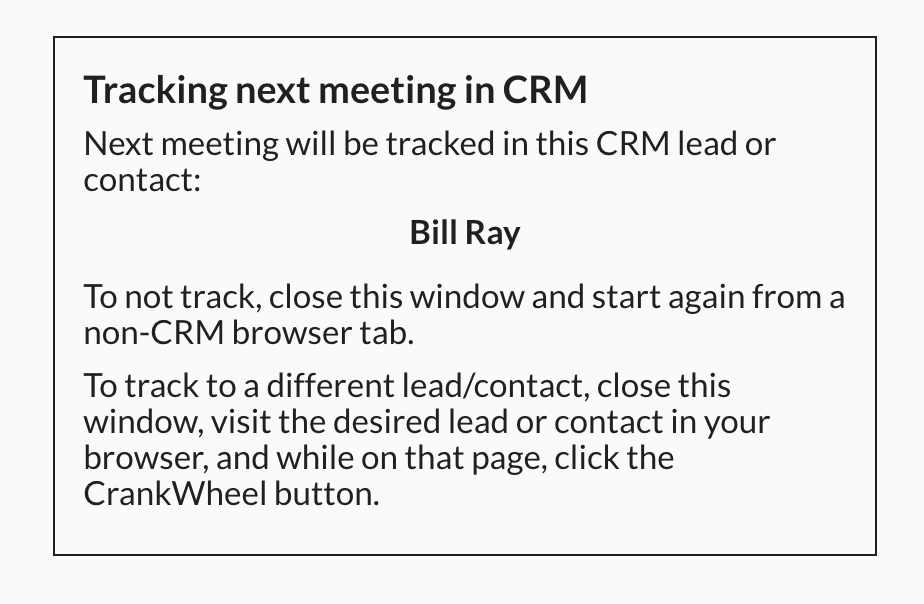
Clicking that button will launch the CrankWheel control panel. You will see a message indicating that the next meeting will be tracked to the contact you chose. When you start a meeting you will see that the fields for email and phone number will be pre-filled with the person’s contact details from Zoho CRM.
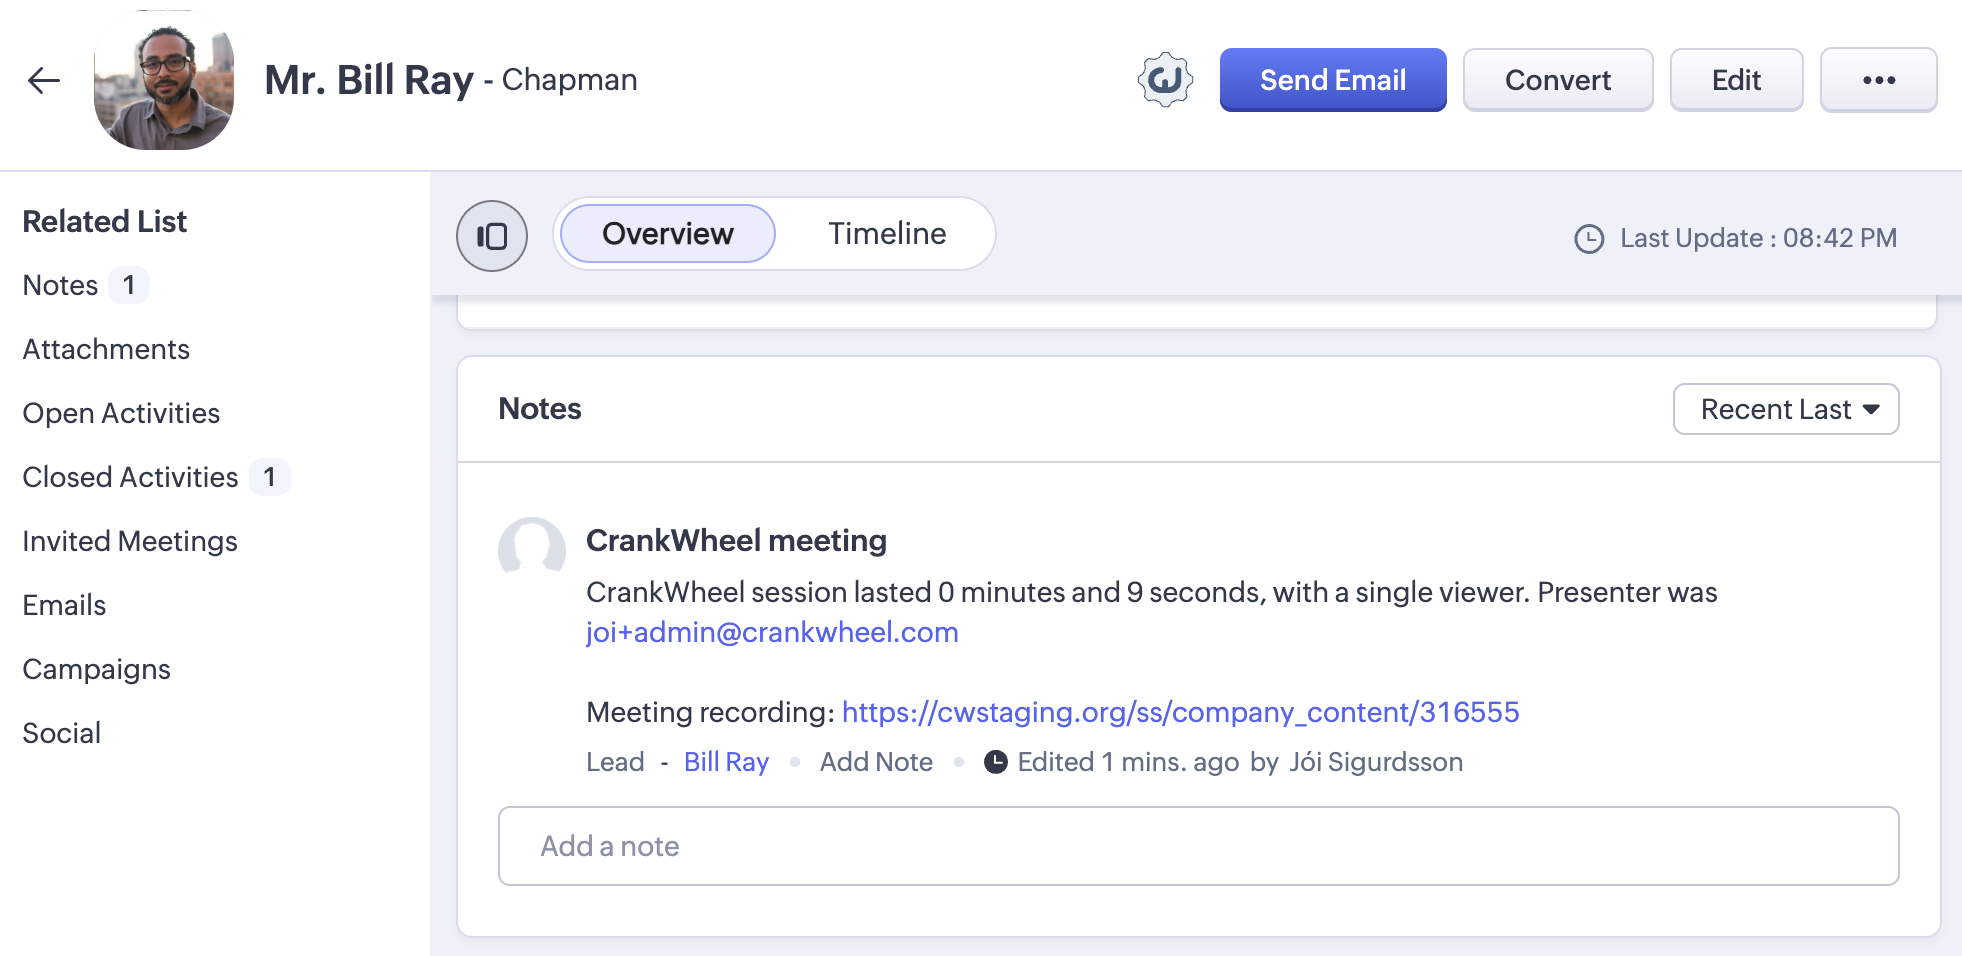
At the conclusion of your meeting, you will also see that the Zoho CRM contact timeline will contain an entry for the CrankWheel meeting, and a link to any recording made.